Tracker plugins in Capture forms
Executive Summary
As HISP groups has increasingly adopted DHIS2 for a growing amount of use cases, a common issue is that they typically need some highly specific feature related to their country, domain or existing workflows. To address this issue, DHIS2 has built an infrastructure to allow for plugins in the tracker data entry forms, which enables end users to add customized code without having to keep their own fork of the application. This has the potential to simplify and improve data entry accuracy and further adoption of tracker use cases. In collaboration with HISP Vietnam and Laos, DHIS2 has tested this infrastructure with a custom feature called "the village selector". This report provides an implementation guide, technical description, results of the plugin framework, and concludes with an assessment of the effectiveness of this approach for customizing DHIS2.
How to set up a Form Field Plugin
Set up a plugin environment:
-
Check out the current development branch of the data entry plugins issue
-
Branch name: eh/feat/DHIS2-14729_RenderDataEntryPlugins
-
-
Clone the tracker-plugin repo
-
This is a hello world application that displays what inputs and callbacks are available to you
-
Build the repo using
yarn build
-
Upload the plugin to your DHIS2-instance using
app management- Use the
Manual installtab to upload custom applications
- Use the
-
Add the plugin configuration to datastore management
-
Open the data store management app in DHIS2
-
Create a new key under capture called dataEntryForms
-
Add a config object similarly to the example config provided below (replace the values with your id’s)
-
This config provides a configuration of which form fields to display.
-
Every item in the array will be treated as a form section.
-
Each element in the array represent a Tracked data model object that should be mapped and sent in. (As of now, only
TrackedEntityAttributeandAttributeis available) -
It is important that you give the plugin for fields a unique id as IdFromPlugin.
-
PluginSource is the path to your running plugin application (see point 4)
-
-
-
Start the Capture app (or build and deploy to your instance)
-
Be sure that all dependencies are installed correctly
-
This branch uses an experimental release from App-runtime that has not been released. This might cause some tinkering to get right. Capture required node 16 to run.
-
-
The plugin will be hosted from
http://{instance_url}/api/apps/{app_name}/plugin.html -
Open the data entry form
Sierra Leone example config:
{
  "IpHINAT79UW": \[ // This is the scope the form-config should apply for. Either programId or TET Id
    { // Each object in this array maps to one section in the form. Use one object for a basic form.
      "id": "test", // Technical ID, just make sure it's unique
      "name": "Section 1", // This is the displayName showed on top of the section
      "elements": \[ // Each element in this list maps to a data element / TEA or Plugin the form displays.
        {
          "id": "w75KJ2mc4zz", // TEA ID
          "type": "dataElement" // Choose between dataElement / plugin / Attribute
        },
        {
          "id": "zDhUuAYrxNC",
          "type": "dataElement"
        }
      \]
    },
    {
      "id": "plugin",
      "name": "Section 2",
      "elements": \[
        {
          "id": "plugin",
          "name": "village\_selector",
          "pluginSource": "http://localhost:8080/api/apps/tracker-plugin/plugin.html", // URL to uploaded plugin
          "type": "plugin",
          "fieldMap": \[ // An array that maps a Plugin Id to a DE/TEA Id
            {
              "IdFromApp": "w75KJ2mc4zz", // DE/TEA Id
              "IdFromPlugin": "region", // PluginId
              "objectType": "dataElement" // dataElement | Attribute (Custom Attribute, not TEA)
            },
            {
              "IdFromApp": "zDhUuAYrxNC",
              "IdFromPlugin": "village",
              "objectType": "dataElement"
            },
            {
              "IdFromApp": "yx2MCEAfU8N",
              "IdFromPlugin": "TestAttribute",
              "objectType": "Attribute"
            }
          \]
        },
        {
          "id": "cejWyOfXge6",
          "type": "dataElement"
        }
      \]
    }
  \]
}
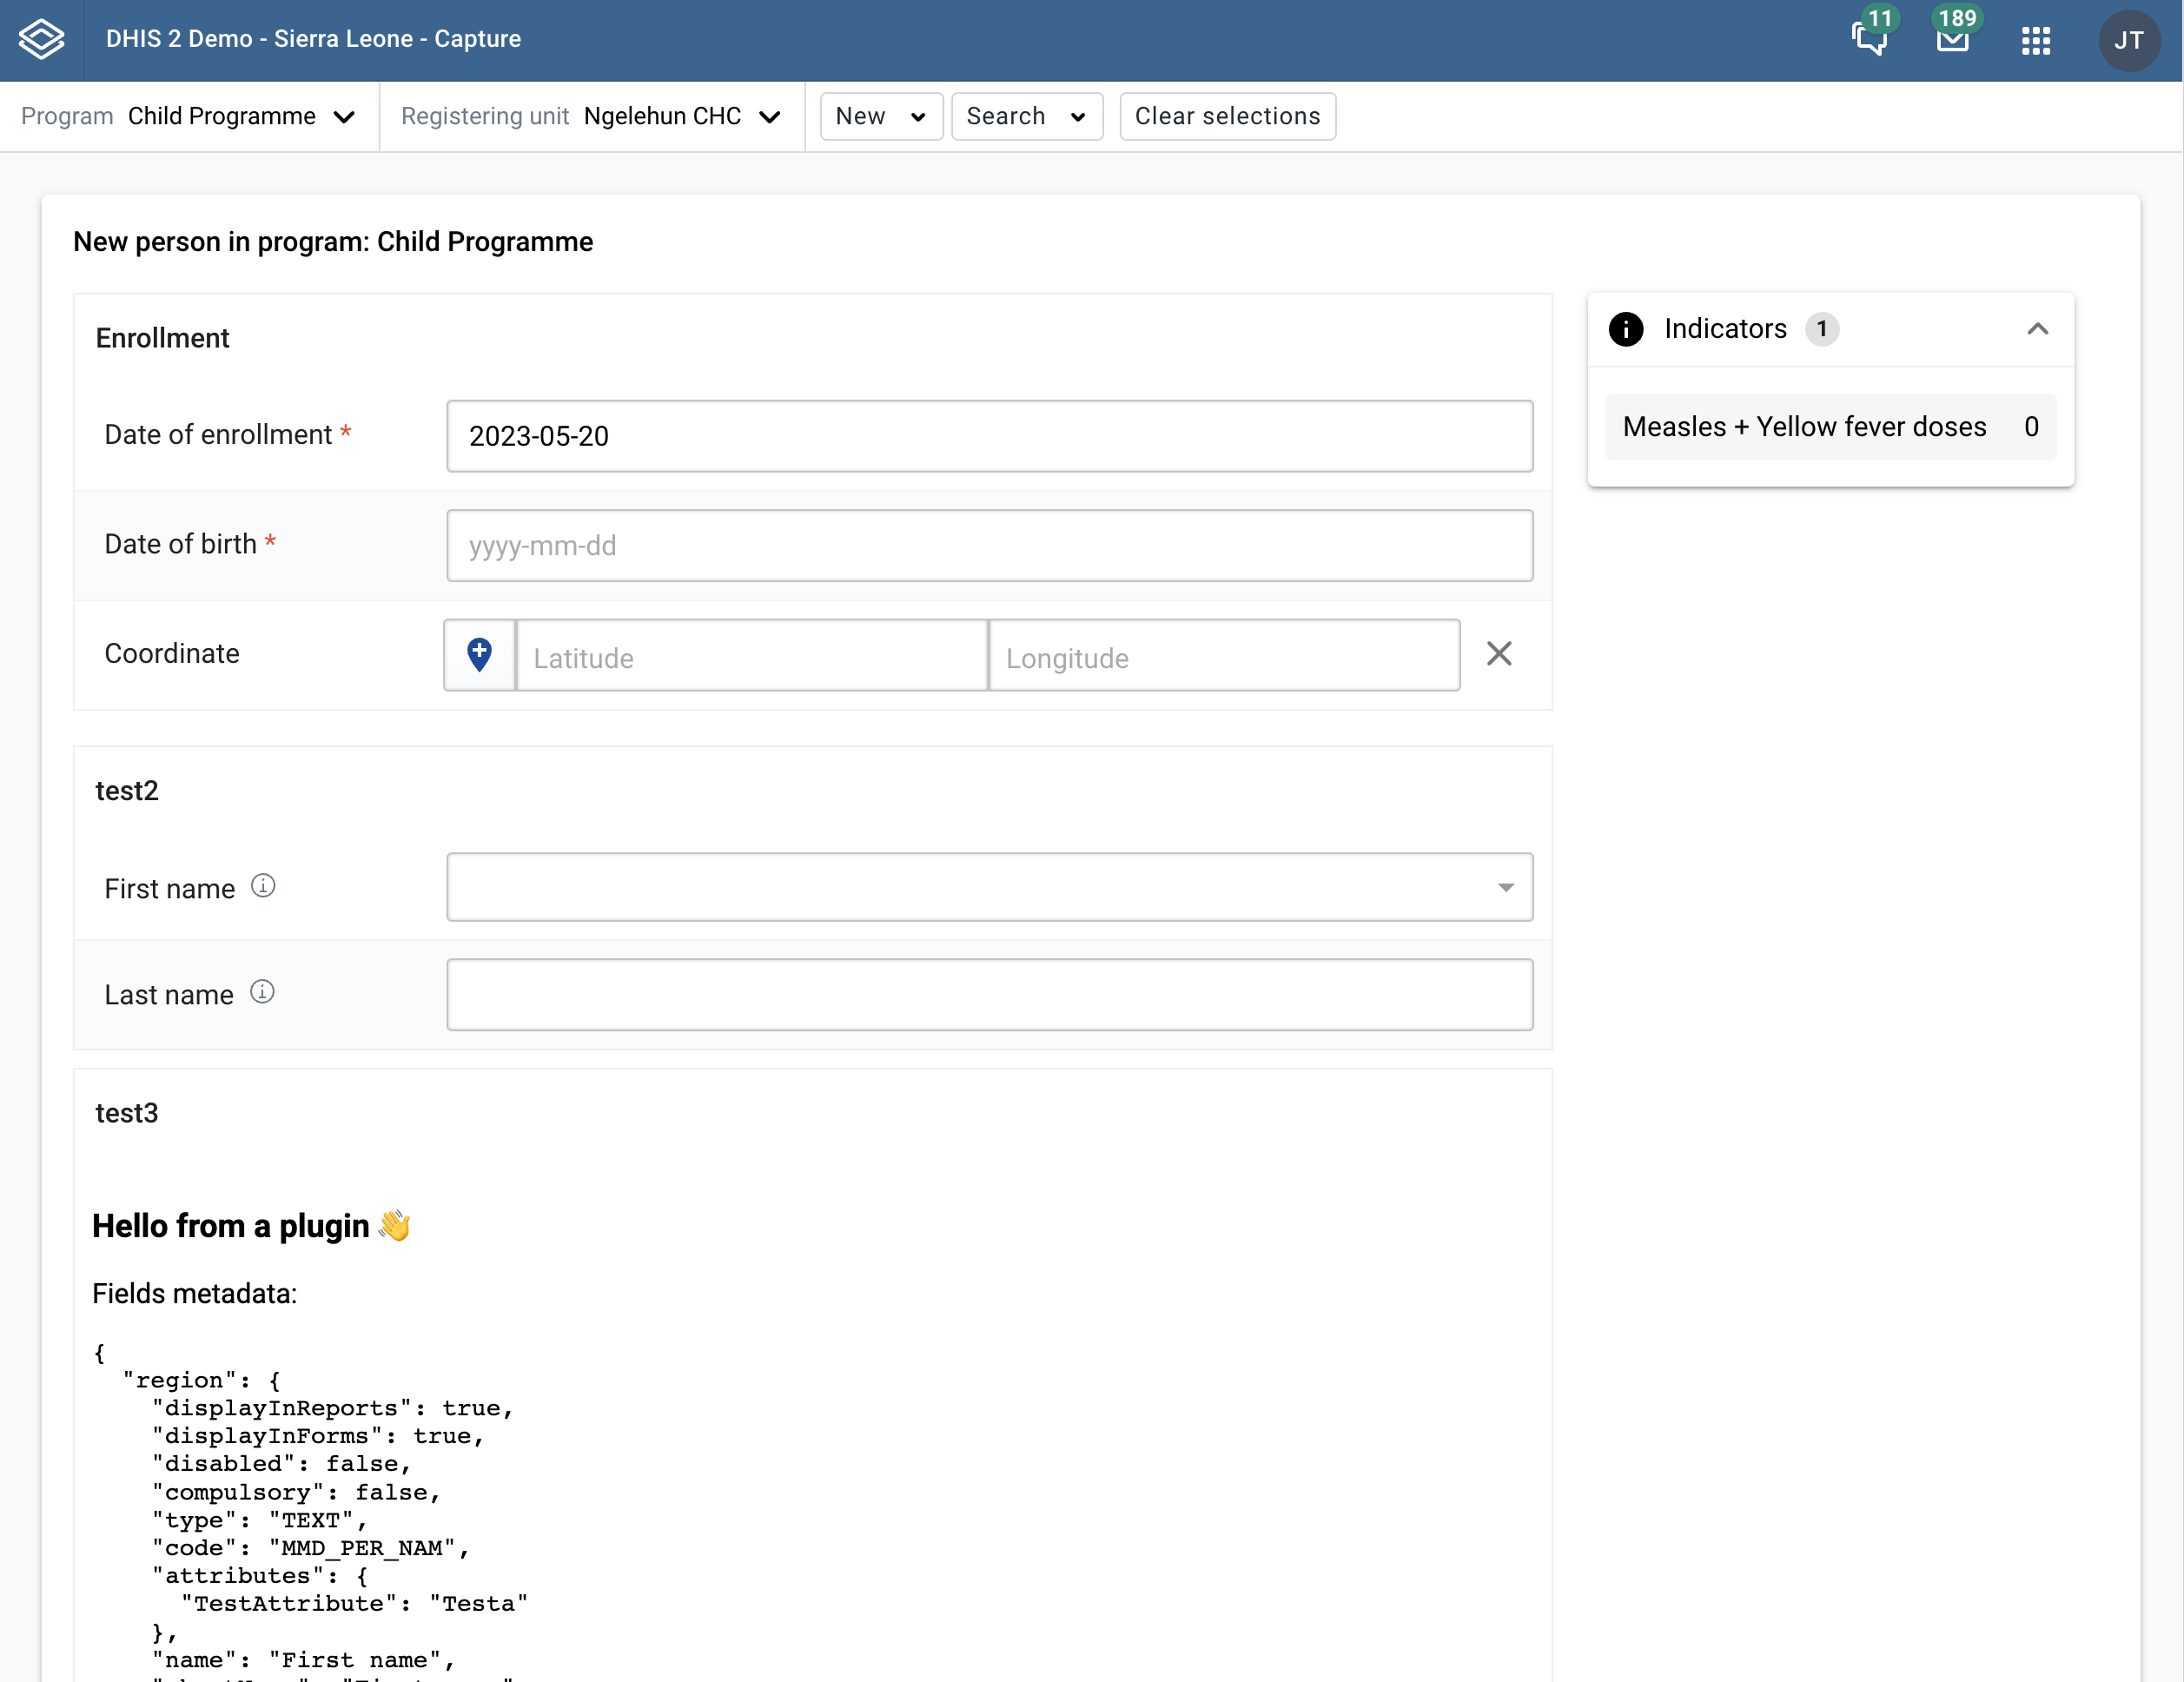
This gives you the following form when you try to enroll a person to the Child Programme
Plugin interface
We provide some props and callbacks to the plugin that you can use to interact with the form. Below is the Typescript definitions of the interface provided
type fieldsMetadata = {
    id: string;
    name: string;
    shortName: string;
    formName: string;
    disabled: boolean;
    compulsory: boolean;
    description: string;
    type: string;
    optionSet: any;
    displayInForms: boolean;
    displayInReports: boolean;
    icon: any;
    unique: any;
    searchable: boolean | undefined;
    url: string | undefined;
}

type FieldValueOptions = {
    valid?: boolean,
    touched?: boolean,
    error?: string,
}

type SetFieldValueProps = {
    fieldId: string,
    value: any,
    options?: FieldValueOptions,
}

type SetContextFieldValueProps = {
    fieldId: 'geometry' | 'occurredAt' | 'enrolledAt'
    value: any,
    options?: FieldValueOptions,
}

export type IDataEntryPluginProps = {
    values: Record<string, any>;
    errors: Record<string, string\[\]>;
    warnings: Record<string, string\[\]>;
    orgUnitId: string;
    formSubmitted: boolean;
    fieldsMetadata: Record<string, fieldsMetadata>;
    setFieldValue: (values: SetFieldValueProps) => void;
    setContextFieldValue: (values: SetContextFieldValueProps) => void;
}
Plugin config (Without comments)
{
  "IpHINAT79UW": \[
    {
      "id": "test",
      "name": "Section 1",
      "elements": \[
        {
          "id": "w75KJ2mc4zz",
          "type": "dataElement"
        },
        {
          "id": "zDhUuAYrxNC",
          "type": "dataElement"
        }
      \]
    },
    {
      "id": "plugin",
      "name": "Section 2",
      "elements": \[
        {
          "id": "plugin",
          "name": "village\_selector",
          "pluginSource": "http://localhost:8080/api/apps/tracker-plugin/plugin.html",
          "type": "plugin",
          "fieldMap": \[
            {
              "IdFromApp": "w75KJ2mc4zz",
              "IdFromPlugin": "region",
              "objectType": "dataElement"
            },
            {
              "IdFromApp": "zDhUuAYrxNC",
              "IdFromPlugin": "village",
              "objectType": "dataElement"
            },
            {
              "IdFromApp": "yx2MCEAfU8N",
              "IdFromPlugin": "TestAttribute",
              "objectType": "Attribute"
            }
          \]
        },
        {
          "id": "cejWyOfXge6",
          "type": "dataElement"
        }
      \]
    }
  \]
}